

Photo: Domenico Loia / Unsplash
⚙️ Settings

Checkout settings

Set a minimum order, store pickup, out-of-stock behavior, the checkout form fields, layout and button texts.

⏱ 3 min read🖼 2 screenshotsUpdated:
🖥️ Open in dashboard/dashboard/settings?section=checkout-settings

Checkout is the last step before a shopper becomes a customer, so small changes here matter. Checkout Settings control what customers must fill in, whether they can pick up from your store, how sold-out products behave, and the texts they see on the checkout page.

Go to Settings › Checkout Settings. Options are grouped into Checkout & orders, Fulfillment, Product visibility, Checkout form, Checkout layout and Checkout page texts.

Change your checkout
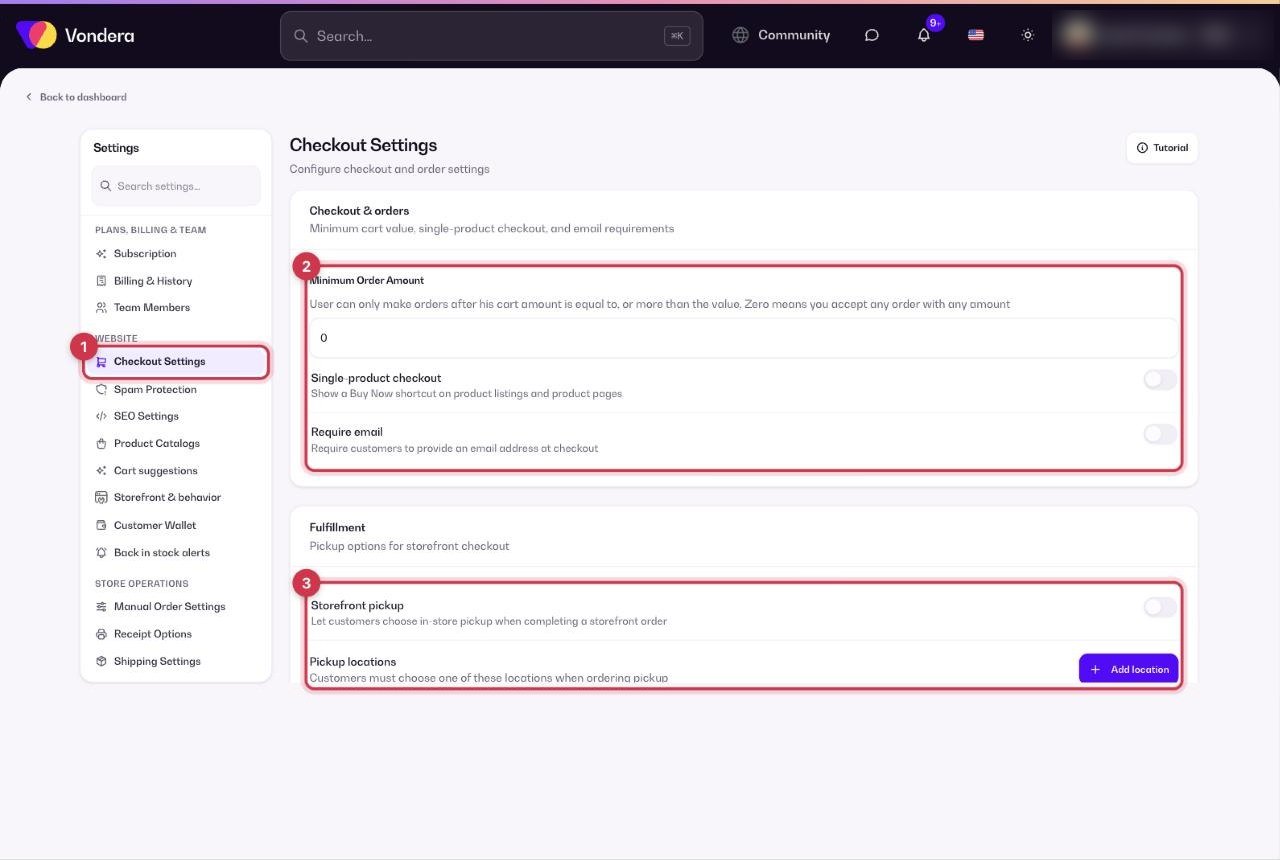
1 Checkout Settings · 2 Turn options on or off · 3 Storefront pickup and Add location
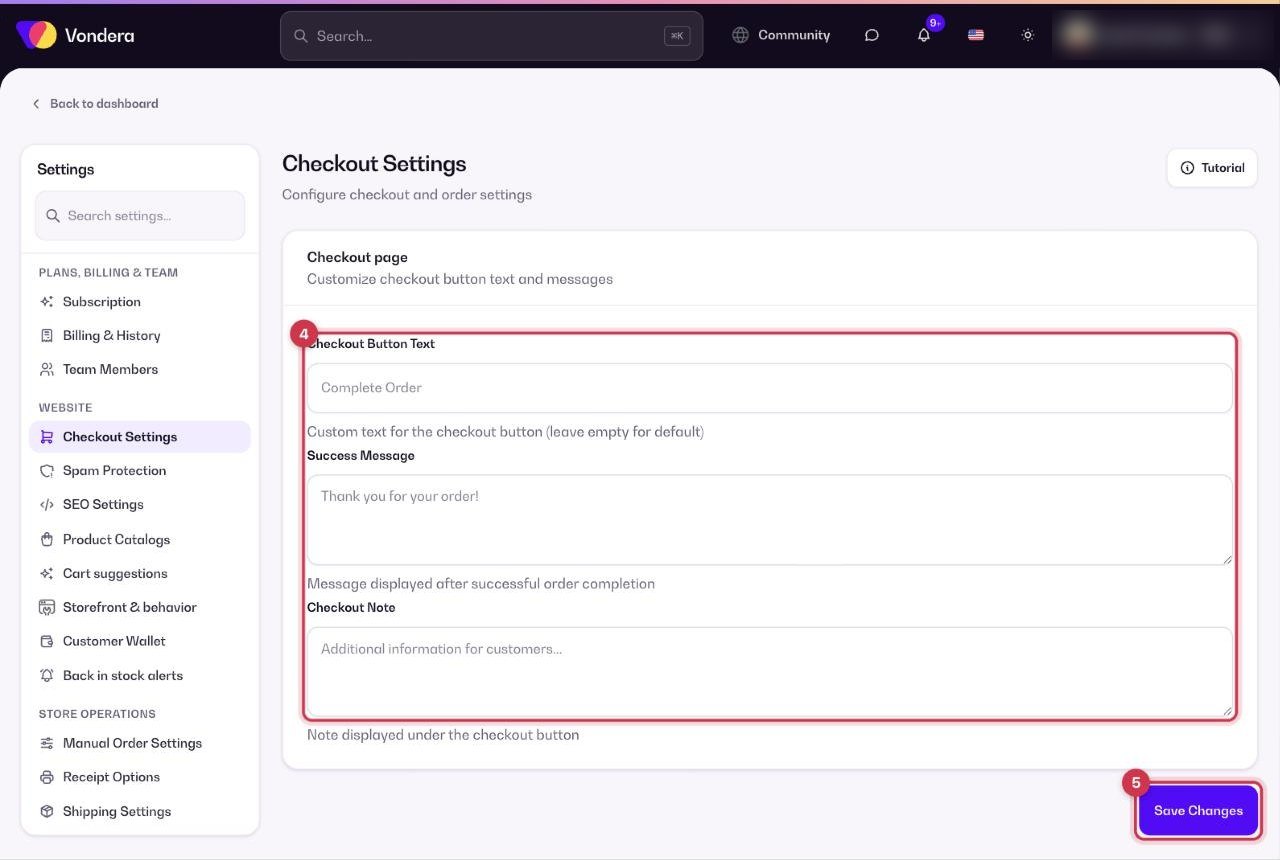
4 Checkout texts · 5 Save Changes
  1. Open Settings › Checkout Settings.
  2. Turn on or off the options you need in each group (see the tables below).
  3. To offer store pickup, turn on Storefront pickup, then click Add location and add at least one active pickup location.
  4. Edit the checkout texts if you want your own wording.
  5. Click Save Changes, then place a test order on your store to check the result.

Orders and fulfillment

Minimum Order Amount
The smallest order total you accept. Set it to 0 to accept any amount.
Single-product checkout
Shows a Buy Now shortcut on product lists and product pages so customers can check out one product directly.
Require email
Customers must enter an email address to place an order.
Storefront pickup
Lets customers choose to pick up their order from your store instead of delivery.
Pickup locations / Add location
The places customers can pick up from. Pickup only shows on the storefront when at least one location is active.

Product visibility and checkout form

Prepaid out-of-stock products
Customers can still buy sold-out items if they pay online in advance.
Hide out of stock products
Removes sold-out products from product lists. Direct links to the product still work.
Show Email Field
Shows the email field on the checkout form.
Show Alternative Phone
Adds a second phone number field — useful for couriers when the first number is unreachable.
Enable all phone country codes
Customers can pick any country code. When off, only your storefront country code is allowed.

Layout and texts

Checkout layout
The page design, for example Style 1 — Form left, summary right.
Address Form Style
Choose a compact form with one simple address field, or a detailed address form.
Checkout Button Text
The text on the order button, for example “Complete Order”.
Success Message
What customers see after ordering, for example “Thank you for your order!”.
Checkout Note
A short note shown under the checkout button — good for delivery times or return policy.
💡 TipFewer fields usually means more completed orders. If most of your customers order by phone confirmation, keep the email optional and turn on Show Alternative Phone instead.

Common questions

I turned on store pickup but customers don’t see it.

Pickup only appears when you have at least one active pickup location. Add one with Add location and save.

If I hide out-of-stock products, can people still open them?

Yes. They disappear from lists, but anyone with the direct link can still open the product page.

What’s the difference between Require email and Show Email Field?

Show Email Field shows the field on the form; Require email makes it mandatory, so the order can’t be placed without it.

Still need help?

Our support team is available 11 AM–7 PM (Egypt time), Saturday to Thursday.